Monday, March 10, 2014

I would not last in a Chinese restaurant as the "egg roll" person.......

...............but this recipe was totally worth the hassle!!


Once again, I would not make a good egg roll person.  By the end I was getting better but they did not look pretty at all.  Good thing they tasted AMAZING!  So if you love buffalo chicken and want to take the time to wrestle with egg roll wrappers, you MUST try this recipe for Buffalo Chicken Egg Rolls......SO YUMMY!!!  By far one of our favorites and will make an appearance on our menu again soon!  I am on a mission now, to roll the perfect egg roll, haha!  Enjoy!

Buffalo Chicken Egg Rolls
Ingredients 

For the egg rolls:
  • 12 egg roll wrappers (roughly 4 square inches)
  • 1 cup cooked and shredded chicken (After I cooked the chicken, I used my Tupperware Quick Chef Pro System (food processor) to shred, it worked perfectly!  Click here to order yours today!)
  • ½ - 2/3 cup hot sauce
  • 4 oz cheddar, shredded or crumbled blue cheese
  • 1 cup shredded cabbage or coleslaw mix (without the dressing)
  • Small bowl of water
  • Cooking spray 
For serving:
Instructions
  1. Preheat oven to 400° F. Line a baking sheet with parchment paper.
  2. In a large bowl, toss the chicken with ½ cup of hot sauce, adding up to a total of 2/3 cup if the chicken seems to soak up the sauce really quickly – it probably will.
  3. Lay an egg roll wrapper out on a clean work surface with one corner facing you and spread about 1 tablespoon cabbage or coleslaw horizontally across the wrapper. Top with 2 tablespoons (or a small cookie scoop) of chicken then 1 tablespoon of cheese.
  4. To roll the egg roll, pull the corner closest to you up towards the center of the filling and wrap it under the filling. Fold in the right and left corners, sealing the two with a dab of water. Roll the egg roll away from you, while gently snuggling the egg roll into itself to keep it from falling apart. Be careful not to tug too hard anywhere – the wrapper can tear easily. Seal the final corner onto the egg roll with another dab of water and place the egg roll seam-side down on the prepared baking sheet. Repeat with 11 remaining wrappers. You’ll probably end up with quite a few wrappers left over – they can be tucked inside a zip-top bag and frozen on a flat surface. Thaw in the fridge before using again.
  5. Lightly spray the tops of the egg rolls with cooking spray and bake for 12 to 17 minutes, flipping over halfway through, until golden brown and crispy. Serve with blue or ranch cheese dressing.
Source-adapted from Smells Like Home

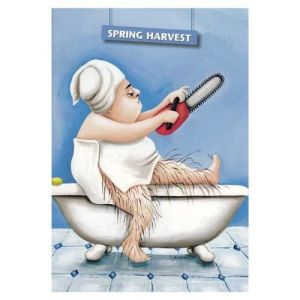
Brush the dust off those razors, spring is on the way!!


38ddd83d04656ac83f84740c3aa0be87 
I love this picture!  It cracks me up every time because let's face it, during the winter months what woman really wants to shave her legs?!?  Maybe I'm the only one that doesn't but I find that hard to believe.  So with spring supposedly around the corner, it's time to dust off those razors, bust out the wax and tackle that forest of hair ladies!  And why not mix up a quick batch of homemade shave lotion while you are at it?  What's this you say?  Shave lotion?  Yes, exactly.  It will leave your legs feeling smooth and hydrated.  The recipe I use is simple and inexpensive, in fact most ingredients I found at the dollar store!  And the amount you save and quantity you get is amazing!!  So here it is, really simple and the best part is you can use any scent you want.  I made a coconut lime batch that was green, and made some cute St. Patrick's Day gifts for some friends.

Homemade Shave Lotion
1 C shampoo
1 C conditioner
5 tsp baby oil
5 tsp lotion
Mix and let sit for an hour.  Put in pump bottle or any container you may have.  Enjoy!

Rachel

Staying at home means having more time to get things done...says no mom EVER!

Image 

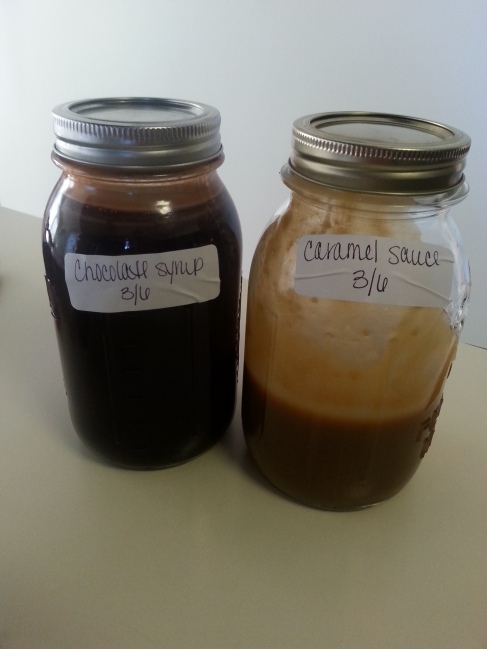
Even when I was a full time working mom, I always thought I didn't have anytime to make some of the homemade things I loved or wanted to make.  Yet somehow, I found the time, to my amazement.  Now that I am staying home, waiting the arrival of baby #2, Fiona, I thought I'd have a little more time to make stuff.  Well, that was a short lived thought.  I have a little more time now but still find that I am busy with our first child, Stella, among other things such as getting settled and finalizing bills, etc.  In my little world, in my head, I am going to do all of these great projects and such but in reality, only a few will get accomplished.  So when I got the spark of energy (which is rare at 7 months pregnant) I took it and ran, and two glorious things were made, caramel sauce and chocolate syrup!  It really didn't take that long, even with the multiple times Stella needed or demanded my attention (I had her help a little which she thought was beyond fun, messy, but fun).  They are simple recipes and a huge cost savings, and I think they taste so much better, more homey as my one friend Amanda put it.  I like that.  So here they are (see below).  Enjoy!

Chocolate Syrup
3/4 C cocoa powder
1 1/4 C water
1 1/2 C sugar
1 1/2 tsp vanilla
Dash, salt
In a 2 qt saucepan or larger, whisk together all ingredients except vanilla over medium/low heat.  Bring to boil, stirring constantly.  Boil for 1-2 minutes.  Remove from heat and add vanilla.  Pour in mason jar and allow to cool completely.  *Please note: at first this will be very runny and thin, but as it cools it will thicken, so don't freak out.

Caramel Sauce
1 C brown sugar
1/2 C whipping cream (or milk, evaporated milk, soy milk, etc)
4 T butter
1 tsp vanilla
Pinch of salt
In a 2 qt saucepan or larger, whisk ingredients together except for vanilla. Bring to boil while stirring constantly.  Boil for 15-20 minutes until thickened.  Remove from heat and add vanilla.  I pour mine in a mason jar but any container will work that can withstand extreme heat.  Allow to cool completely.  If stored in fridge it will harden, just remove and allow to warm to room temperature a few minutes before use.  Or if you are impatient like me, scrape it out of the jar and make a mess!  It's so good in coffee with homemade sweetened condensed milk (yes, I have a recipe for that as well and will post later).  Enjoy!

Rachel

Starting fresh.....

For those that don’t know, our family relocated in January from Michigan to Minnesota due to my husband accepting a job.  We were nervous but excited at the same time.  It was hard leaving our family and friends for sure, not to mention the place we grew up and familiar surroundings.  But, we took a leap of faith and put our trust in God, that this is truly where he wanted us to be.  So here we are.  Minnesota.  My husband has a dream of living in Alaska, I do not.  And after being here for a month and a half, I told him this is as close to Alaska as it’s going to get.  I am staying home now, after working full time, and taking care of our first daughter, Stella, as well as preparing for the arrival of our second daughter, Fiona.  It was a rough transition out here, to say the least (that’s a whole separate post or two!), but we made it and couldn’t be happier.  We definitely have had our challenges on the way, which is the reason for the name of this blog.  On the way out here, my auntie had a change purse that said “Life is all about how you handle plan B”.  I swear I’m going to have that tattooed on my forehead (not really).  We have had more plan B’s than I like but have made the best out of each one, to the best of our ability.  Anyway, despite some ups and downs, we are adjusting well and making new friends. My one friend Amanda, that’s what I call her, suggested that I start a blog.  She caught my interest in this because I am not really up with blogs and such but she mentioned it would be a great way to share all of my home creations and get out there in social networking (haha!).  So she is my motivator for this, let’s hope it works!  I hope you will enjoy my thoughts, recipes, funny mom moments and anything else I come up with….which could be interesting, I surprise myself sometimes!  Take care and enjoy!

Rachel